1.Consul介绍
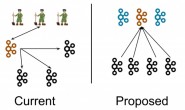
Consul是HashiCorp公司推出的开源工具,用于实现分布式系统的服务发现与配置。内置了服务注册与发现框架、分布一致性协议实现、健康检查、Key/Value存储、多数据中心方案,不再需要依赖其他工具(比如ZooKeeper等)。使用起来也较为简单。
2.Consul 安装
Consul 用 golang实现,因此具有天然的可移植性,安装包仅包含一个可执行文件,方便部署。
下载地址:https://www.consul.io/downloads.html
下载完成后,按照如下命令进行安装
[root@service1 ~]# unzip consul_1.0.0_linux_amd64.zip
[root@service1 ~]# mv consul /usr/bin/
安装完成进行验证
[root@service1 ~]# consul -v
Consul v1.0.0
Protocol 2 spoken by default, understands 2 to 3 (agent will automatically use protocol >2 when speaking to compatible agents)
3.环境介绍
四台服务器
| IP地址 | 主机名 | 操作系统 | |
| server(Leader) | 192.168.28.71 | Service1 | Centos 7.2 |
| server(Follower) | 192.168.28.72 | Service2 | Centos 7.2 |
| agent1 | 192.168.28.61 | Agent1 | Centos 7.2 |
| agent2 | 192.168.28.62 | Agent2 | Centos 7.2 |
4.建立集群
要想利用Consul提供的服务实现服务的注册与发现,我们需要建立Consul Cluster。在Consul方案中,每个提供服务的节点上都要部署和运行Consul的agent,所有运行Consul agent节点的集合构成Consul Cluster。Consul agent有两种运行模式:Server和Client。这里的Server和Client只是Consul集群层面的区分,与搭建在Cluster之上 的应用服务无关。以Server模式运行的Consul agent节点用于维护Consul集群的状态,官方建议每个Consul Cluster至少有3个或以上的运行在Server mode的Agent,Client节点不限。
1、启动一个server
[root@service1 ~]# consul agent -server -bootstrap-expect 2 -data-dir /tmp/consul -node=n1 -bind=192.168.28.71 -ui
参数说明:
-server:集群启动为service
-bootstrap-expect:期待加入service节点的数量
-data-dir:数据目录
-node:节点名称,集群中每个节点名称需唯一
-bind:指定一个consul运行时的监听地址
-ui:启动时启动ui
2、启动一个agent
[root@service2 ~]# consul agent -server -bootstrap-expect 2 -data-dir /tmp/consul -node=n2 -bind=192.168.28.72 -ui
3、通过consul members查看当前agent状态,可以看出server1和server2启动后并不知道其他节点的存在。
[root@service1 ~]# consul members
Node  Address             Status  Type    Build  Protocol  DC   Segment
n1    192.168.28.71:8301  alive   server  1.0.0  2         dc1  <all>
4、使用consul join命令触发Cluster bootstrap过程,将192.168.28.72服务器加入当前集群中
[root@service1 ~]# consul members
Node  Address             Status  Type    Build  Protocol  DC   Segment
n1    192.168.28.71:8301  alive   server  1.0.0  2         dc1  <all>
n2    192.168.28.72:8301  alive   server  1.0.0  2         dc1  <all>
5、join后,两台主机互相知道了对方,并进行了leader election过程,server1被选举为leader,server2为follower
[root@service1 ~]# consul info
……
	protocol_version_max = 3
	protocol_version_min = 0
	snapshot_version_max = 1
	snapshot_version_min = 0
	state = Leader
	term = 35
……
server2查看结果
[root@service2 ~]# consul info
……
	protocol_version_max = 3
	protocol_version_min = 0
	snapshot_version_max = 1
	snapshot_version_min = 0
	state = Follower
	term = 2
……
到这里server1和server2就成为了dc1这个数据中心consul cluster的两个节点,而且是用来维护集群状态的server node。Server1被选举为leader,server2是follower。
5.服务注册与发现
我们建立Consul Cluster是为了实现服务的注册和发现。Consul支持两种服务注册的方式,一种是通过Consul的服务注册HTTP API,由服务自身在启动后调用API注册自己,另外一种则是通过在配置文件中定义服务的方式进行注册。Consul文档中建议使用后面一种方式来做服务 配置和服务注册。
5.1.准备工作
服务准备,我已经在agent1和agent2安装了两台web服务器,提供web服务,我现在就把它注册到consul server上。
[root@service1 ~]# curl http://192.168.28.61:10000
service1
[root@service1 ~]# curl http://192.168.28.62:10000
service2
[root@service1 ~]# curl http://192.168.28.61:10000/health
ok
[root@service1 ~]# curl http://192.168.28.62:10000/health
ok
5.2.服务注册
Consul agent在启动时可以通过-config-dir来指定配置文件所在目录,比如以agent1为例,我们可以如此启动agent1:
[root@agent1 ~]# consul agent -data-dir /tmp/consul -node=n3 -bind=192.168.28.61 -config-dir=./conf
这样在./conf下的所有配置文件扩展名为.json的文件都会被consul agent作为配置文件读取
我们在agent1的consul agent的配置文件目录下创建server1.json文件。
{
  "service": {
    "name": "service1",
    "tags": ["master"],
    "address": "192.168.28.61",
    "port": 10000,
    "checks": [
      {
        "http": "http://localhost:10000/health",
        "interval": "10s"
      }
    ]
  }
}
这个配置就是我们在agent1节点上为service1这个服务做的服务定义,定义中包含,name、address、port,还包含一个服务检测的配置,这里我们每隔10秒对服务进行一次健康检查。
上述操作完成之后,我们只需要在service1节点把agent1节点加入集群,agent1就可以自动把服务注册到集群。
我们可以通过集群提供的web页面来查看注册到的服务。(web页面访问端口为8500,需要在server启动时指定ui参数)。
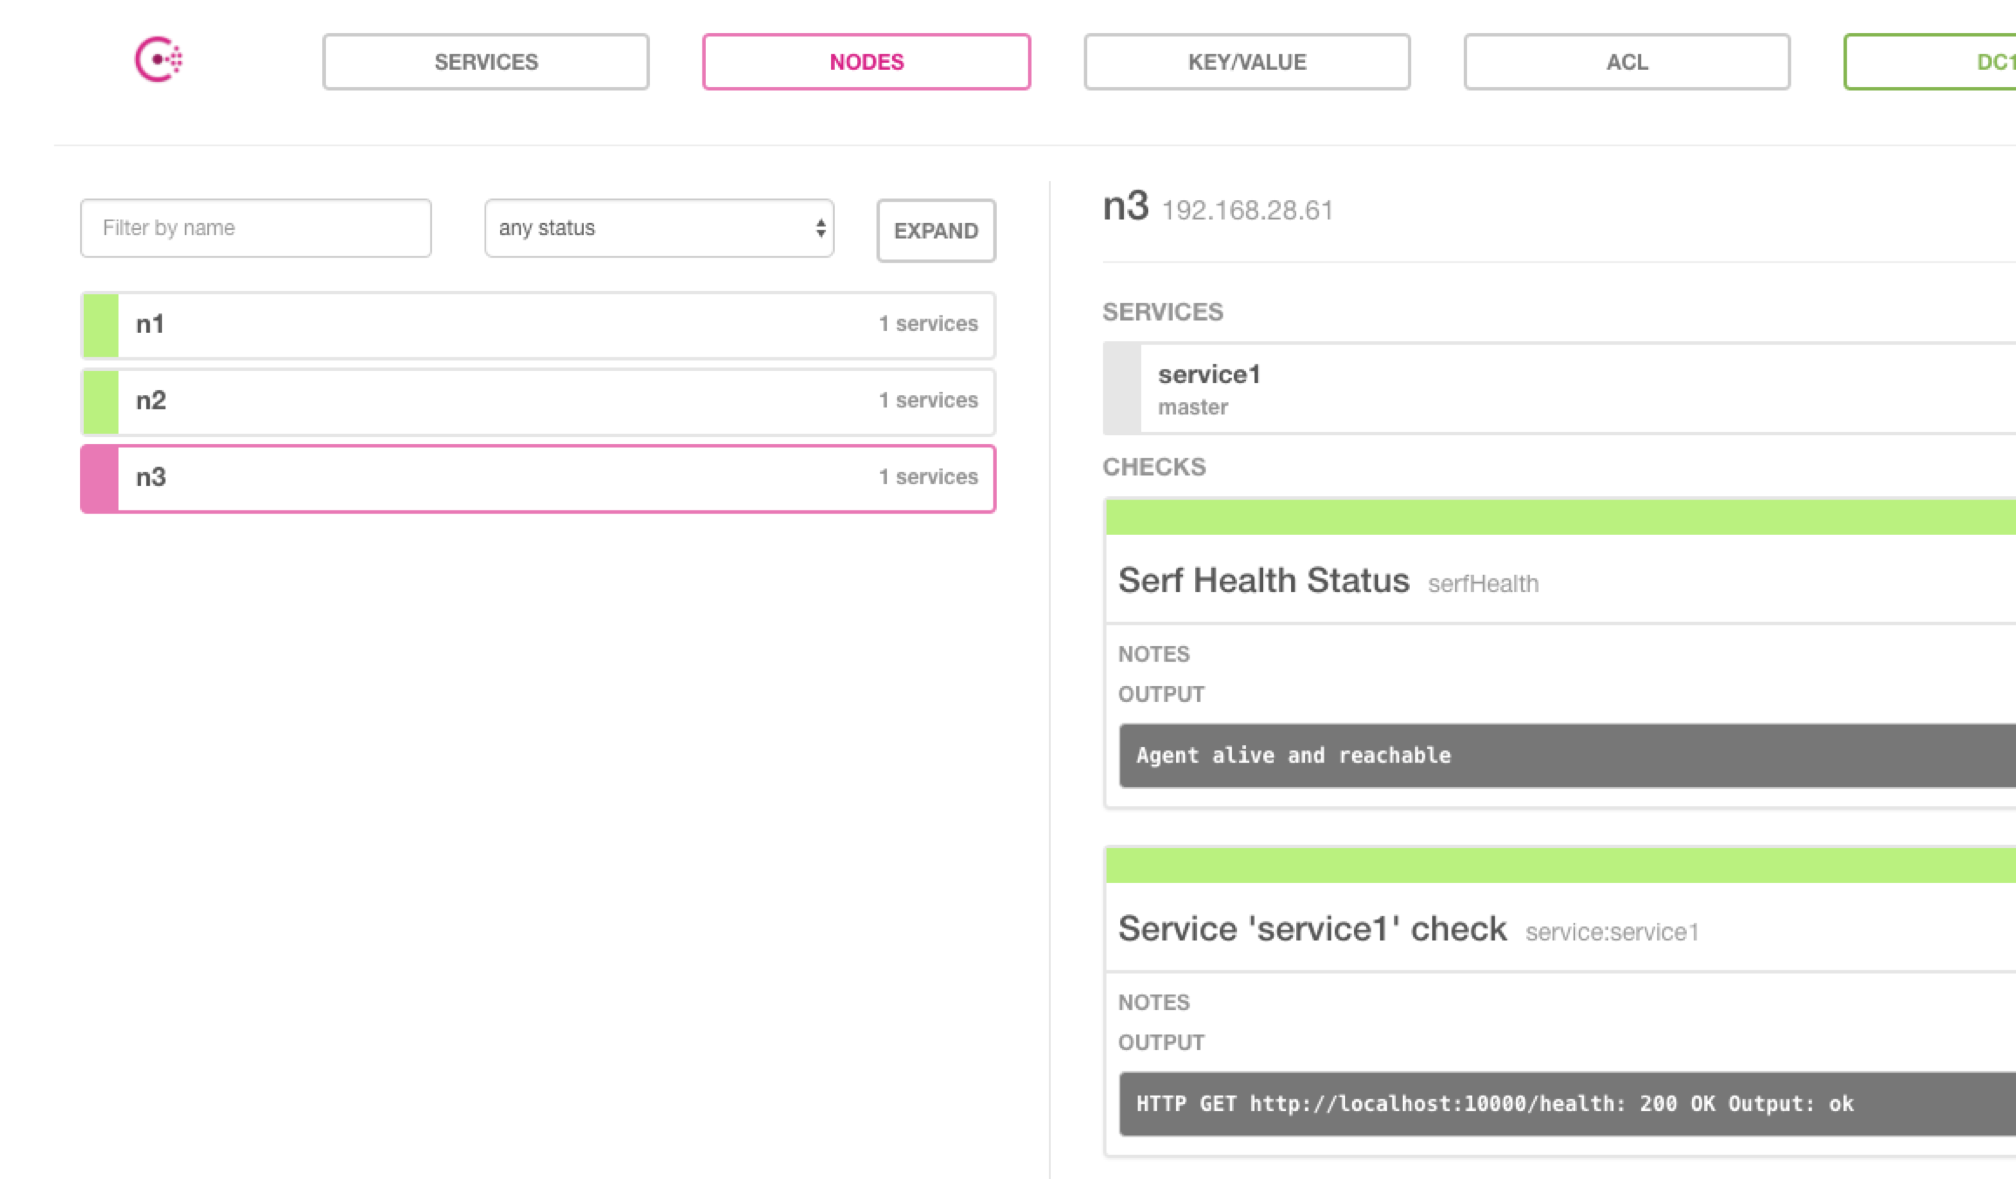
我们可以使用同样的方式吧agent2节点加入到集群,加入后ui显示如下:

5.3.服务发现
Consul提供了两种发现服务的方式,一种是通过HTTP API查看存在哪些服务;另外一种是通过consul agent内置的DNS服务来做。两者的差别在于后者可以根据服务check的实时状态动态调整available服务节点列表。
在agent1和agent2配置和部署完service1服务后,我们就可以通过DNS命令来查询服务的具体信息了。consul为服务编排的内置域名为 “NAME.service.consul”,这样我们的service1的域名为:service1.service.consul。我们在service1通过dig工具来查看一 下,注意是在service1上,service1上并未定义和部署web3服务,但集群中服务的信息已经被同步到n1上了,信息是一致的。
[root@service1 ~]# dig @127.0.0.1 -p 8600 service1.service.consul SRV

; <<>> DiG 9.9.4-RedHat-9.9.4-37.el7 <<>> @127.0.0.1 -p 8600 service1.service.consul SRV
; (1 server found)
;; global options: +cmd
;; Got answer:
;; ->>HEADER<<- opcode: QUERY, status: NOERROR, id: 18460
;; flags: qr aa rd; QUERY: 1, ANSWER: 2, AUTHORITY: 0, ADDITIONAL: 5
;; WARNING: recursion requested but not available

;; OPT PSEUDOSECTION:
; EDNS: version: 0, flags:; udp: 4096
;; QUESTION SECTION:
;service1.service.consul.	IN	SRV

;; ANSWER SECTION:
service1.service.consul. 0	IN	SRV	1 1 10000 n3.node.dc1.consul.
service1.service.consul. 0	IN	SRV	1 1 10000 n4.node.dc1.consul.

;; ADDITIONAL SECTION:
n3.node.dc1.consul.	0	IN	A	192.168.28.61
n3.node.dc1.consul.	0	IN	TXT	"consul-network-segment="
n4.node.dc1.consul.	0	IN	A	192.168.28.62
n4.node.dc1.consul.	0	IN	TXT	"consul-network-segment="

;; Query time: 5 msec
;; SERVER: 127.0.0.1#8600(127.0.0.1)
;; WHEN: 五 11月 03 15:33:49 CST 2017
;; MSG SIZE  rcvd: 232
可以看到在ANSWER SECTION中,我们得到了两个结果:n3和n4上各有一个service1的服务。在dig命令中我们用了SRV标志,那是因为我们需要的服务信息不仅有ip地址,还需要有端口号。
现在我们停掉agent1上的service1服务,10s后,我们再来查一下,我们可以到consul agent故障的service1从结果列表中剔除了,这样service1服务的客户端在服务发现过程中就只能获取到当前可用的service1服务节点了。另外consul agent DNS在返回查询结果时也支持DNS Server常见的策略,至少是支持轮询。你可以多次执行dig命令,可以看到n3和n4的排列顺序是不同的。还有一点值得注意的是:由于考虑DNS cache对consul agent查询结果的影响,默认情况下所有由consul agent返回的结果TTL值均设为0,也就是说不支持dns结果缓存。
[root@service1 ~]# dig @127.0.0.1 -p 8600 service1.service.consul SRV

; <<>> DiG 9.9.4-RedHat-9.9.4-37.el7 <<>> @127.0.0.1 -p 8600 service1.service.consul SRV
; (1 server found)
;; global options: +cmd
;; Got answer:
;; ->>HEADER<<- opcode: QUERY, status: NOERROR, id: 48138
;; flags: qr aa rd; QUERY: 1, ANSWER: 1, AUTHORITY: 0, ADDITIONAL: 3
;; WARNING: recursion requested but not available

;; OPT PSEUDOSECTION:
; EDNS: version: 0, flags:; udp: 4096
;; QUESTION SECTION:
;service1.service.consul.	IN	SRV

;; ANSWER SECTION:
service1.service.consul. 0	IN	SRV	1 1 10000 n3.node.dc1.consul.

;; ADDITIONAL SECTION:
n3.node.dc1.consul.	0	IN	A	192.168.28.61
n3.node.dc1.consul.	0	IN	TXT	"consul-network-segment="

;; Query time: 0 msec
;; SERVER: 127.0.0.1#8600(127.0.0.1)
;; WHEN: 五 11月 03 15:43:29 CST 2017
;; MSG SIZE  rcvd: 142
6.consul-template与nginx联动
6.1.方案概述
nginx提供的负载均衡服务同样支持高可用、可扩展的Web服务,但缺点是较依赖于人工。例如传统的nginx负载均衡的配置方式是,在nginx某个include的某个配置文件中配置一个upstream,upstream中配置多个服务节点,每一个服务节点就是一个web应用服务。nginx虽然可以做到对服务节点的健康检查,但是当服务节点增加、减少或者发生状态改变(如负载较大、网络故障、其他故障)时,nginx配置文件是固定写死的,不能动态的感知后端服务节点的服务状态信息,因此需要有一种解决方案能够帮助ngnix动态的感知后端服务节点的服务信息。
6.2.配置概述
nginx前端作为负载均衡器使用,它代理了三台能提供web服务的服务器,每一台服务器上均安装consul,并以agent的形式运行在服务器上,并将Consul Agent加入到Consul Cluster中。Consul-template与Consul Cluster的Server连接,动态的从Consul的服务信息库汇中拉取nginx代理的三台服务器的IP、端口号等信息,并将IP地址以及端口号写入到nginx的配置文件中,在完成一次写入后(即后台服务发生变更时),Consul-template将自动将nginx重启加载,实现nginx应用新配置文件的目的。
6.3.配置过程
在上文中,我们已经构建了一个consul集群了,我们需要在这个集群的基础上添加如下服务:
1、 在server1 节点安装并配置nginx服务
2、 在server1节点安装并配置consul-template服务
3、 验证与测试
环境安装
yum -y install nginx
wget -c https://releases.hashicorp.com/consul-template/0.12.0/consul-template_0.12.0_linux_amd64.zip
unzip -d . consul-template_0.12.0_linux_amd64.zip
cp consul-template '/bin'
rm -rf consul*
配置consul-template
准备一个nginx模版配置文件
[root@service1 ~]# cat nginx_service1.ctmpl
upstream service1 {
    ip_hash;
{{range service "service1"}}
    server {{.Address}}:{{.Port}} fail_timeout=0;
{{end}}
    keepalive 64;
}
server {
    listen 10000;
    server_name ipaddress;
    location / {
        proxy_pass          http://service1/;
    }
}
启动consul-template:consul-template将查询consul集群的服务注册信息,并自动更新到nginx配置文件,完成之后还能执行nginx重载命令。
[root@service1 ~]# consul-template -consul 127.0.0.1:8500 -template nginx_service1.ctmpl:/etc/nginx/conf.d/nginx_service1.conf:"/usr/sbin/nginx -s reload"
验证:在consul-template进程启动之后,查看nginx配置文件目录,可以看到server1的膜拜已经推送了过来,并且自动添加了已经注册的服务地址和端口。
[root@service1 ~]# cat /etc/nginx/conf.d/nginx_service1.conf
upstream service1 {
    ip_hash;

    server 192.168.28.61:10000 fail_timeout=0;
    server 192.168.28.62:10000 fail_timeout=0;
    keepalive 64;
}
server {
    listen 10000;
    server_name ipaddress;
    location / {
        proxy_pass          http://service1/;
    }
}
我们将192.168.28.62服务器下线,等10秒后再查看nginx配置文件,可以看到192.168.28.62服务器已经自动下线了。
[root@service1 ~]# cat /etc/nginx/conf.d/nginx_service1.conf
upstream service1 {
    ip_hash;

    server 192.168.28.61:10000 fail_timeout=0;

    keepalive 64;
}
server {
    listen 10000;
    server_name ipaddress;
    location / {
        proxy_pass          http://service1/;
    }
}
7.参考文档
http://dockone.io/article/1359
https://studygolang.com/articles/4476
http://www.techweb.com.cn/network/system/2016-01-28/2270190.shtml
转载请注明:西门飞冰的博客 » consul 服务注册发现以及与nginx联动