1.介绍
自Spring 3.1版本以来,Spring框架支持低侵入的方式向已有Spring应用加入缓存特性。与声明式事务类似,声明式缓存Spring Cache抽象允许一致的API来已支持多种不同的缓存解决方案,同时将对代码的影响减少到最小。
2.准备工作
0、创建一个Spring boot工程,引入redis依赖,可以完成和redis服务的交互,具体配置方式参考前文 SpringBoot与Redis7交互。
1、创建测试使用到的相关片汤代码。
import java.io.Serializable;
import java.util.Date;

public class Emp implements Serializable{
    private Integer empno;
    private String name;
    private Date birthday;
    private Float salary;
    private String department;
    public Emp(){ //必须要有默认构造函数

    }
    public Emp(Integer empno, String name, Date birthday, Float salary, String department) {
        this.empno = empno;
        this.name = name;
        this.birthday = birthday;
        this.salary = salary;
        this.department = department;
    }

    public Integer getEmpno() {
        return empno;
    }

    public void setEmpno(Integer empno) {
        this.empno = empno;
    }

    public String getName() {
        return name;
    }

    public void setName(String name) {
        this.name = name;
    }

    public Date getBirthday() {
        return birthday;
    }

    public void setBirthday(Date birthday) {
        this.birthday = birthday;
    }

    public Float getSalary() {
        return salary;
    }

    public void setSalary(Float salary) {
        this.salary = salary;
    }

    public String getDepartment() {
        return department;
    }

    public void setDepartment(String department) {
        this.department = department;
    }

    @Override
    public String toString() {
        return "Emp{" +
                "empno=" + empno +
                ", name='" + name + '\'' +
                ", birthday=" + birthday +
                ", salary=" + salary +
                ", department='" + department + '\'' +
                '}';
    }
}
Dao代码:
import com.fblinux.sbredis.entity.Emp;
import org.springframework.stereotype.Repository;

import java.util.ArrayList;
import java.util.Date;
import java.util.List;
@Repository
public class EmpDAO {
    public Emp findById(Integer empId){
        System.out.println("执行了findById方法:EmpId:" + empId);
        return new Emp(empId , "fblinux"  , new Date()  , 1000f ,"RESEARCH");
    }

    public List<Emp> selectByParams(){
        System.out.println("已执行selectByPrams方法");
        List list = new ArrayList();
        for(int i = 0 ; i < 10 ; i++) {
            list.add(new Emp(i , "emp" +  i , new Date() , 5000 + i * 100f , "RESEARCH"));
        }
        return list;
    }

    public Emp insert(Emp emp){
        System.out.println("正在创建" + emp.getEmpno() + "员工信息");
        return emp;
    }

    public Emp update(Emp emp){
        System.out.println("正在更新" + emp.getEmpno() + "员工信息");
        return emp;
    }

    public void delete(Integer empno){
        System.out.println("删除" + empno + "员工信息");
    }
}
3.使用Spring Cache
第一步:Spring Boot入口类添加EnableCaching注解,开启Spring Cache
@SpringBootApplication

public class SbredisApplication {
    public static void main(String[] args) {
        SpringApplication.run(SpbRedisApplication.class, args);
    }
}
第二步:在业务代码层面使用@Cacheable等注解声明式的控制缓存
三个核心注解:
@ Cacheable:设置缓存。
Cacheable会将方法的返回值序列化后存储到redis中,key就是参数执行的字符串
Cacheable的用途就是在执行方法前检查对应的key是否存在,存在则直接从redis中取出不执行方法中的代码,没有对应的key则执行方法代码,并将返回值序列化保存到redis中
@ CachePut:更新缓存:可以对指定的key进行创建或者更新,通常用于更新和插入操作
@ CacheEvict:删除缓存:通常用于删除数据的过程使用
@Service
public class EmpService {
    @Resource
    EmpDAO empDao;

  	// key:根据查询id的不同,为每一个查询的不同id在redis中创建一个缓存key
    //condition:代表条件成立的时候才执行缓存的数据 , 反之有一个unless ,代表条件不成立的时候才获取缓存
    @Cacheable(value = "emp" , key = "#empId" ,condition = "#empId != 1000")
    public Emp findById(Integer empId) {
        return empDao.findById(empId);
    }

    @Cacheable(value = "emp:rank:salary")
    public List<Emp> getEmpRank() {
        return empDao.selectByParams();
    }
    //@CachePut 更新缓存,没有key则创建
    @CachePut(value="emp" , key="#emp.empno")
    public Emp create(Emp emp) {
        return empDao.insert(emp);
    }

    @CachePut(value="emp" , key="#emp.empno")
    public Emp update(Emp emp) {
        return empDao.update(emp);
    }
    //@CacheEvict 删除缓存
    @CacheEvict(value = "emp",key = "#empno")
    public void delete(Integer empno) {
        empDao.delete(empno);
    }

}
第三步:做一个测试用例
import com.fblinux.sbredis.SbredisApplication;
import com.fblinux.sbredis.entity.Emp;
import com.fblinux.sbredis.service.EmpService;
import org.junit.jupiter.api.Test;
import org.springframework.boot.test.context.SpringBootTest;

import javax.annotation.Resource;
import java.util.Date;
import java.util.List;

@SpringBootTest(classes = SbredisApplication.class)
public class SpringCacheTestor {
    @Resource
    private EmpService empService;

    @Test
    public void testFindById(){
        Emp emp = empService.findById(1001);
        emp = empService.findById(1001);
        emp = empService.findById(1001);
        emp = empService.findById(1001);
        emp = empService.findById(1001);
        emp = empService.findById(1001);
        System.out.println(emp.getName());
        emp = empService.findById(1000);
        emp = empService.findById(1000);
        emp = empService.findById(1000);
        System.out.println(emp.getName());
    }

    @Test
    public void testEmpRank() {
        List<Emp> list = empService.getEmpRank();
        list = empService.getEmpRank();
        for(Emp emp:list){
            System.out.println(emp);
        }
    }
    @Test
    public void testCreate(){
        empService.create(new Emp(1002 , "emp" + new Date().getTime() , new Date() , 1234f , "MARKET"));
        empService.create(new Emp(1002 , "emp" + new Date().getTime() , new Date() , 1234f , "MARKET"));
        empService.create(new Emp(1002 , "emp" + new Date().getTime() , new Date() , 1234f , "MARKET"));
        Emp emp = empService.findById(1002);
        System.out.println(emp);
    }

    @Test
    public void testUpdate(){
        empService.update(new Emp(1002 , "u-emp" + new Date().getTime() , new Date() , 1234f , "MARKET"));
        empService.update(new Emp(1002 , "u-emp" + new Date().getTime() , new Date() , 1234f , "MARKET"));
        empService.update(new Emp(1002 , "u-emp" + new Date().getTime() , new Date() , 1234f , "MARKET"));
        Emp emp = empService.findById(1002);
        System.out.println(emp);
    }
    @Test
    public void testDelete(){
        empService.delete(1002);
        //Emp emp = empService.findById(1002);
        //System.out.println(emp);
    }
}
第四步:验证缓存是否生效
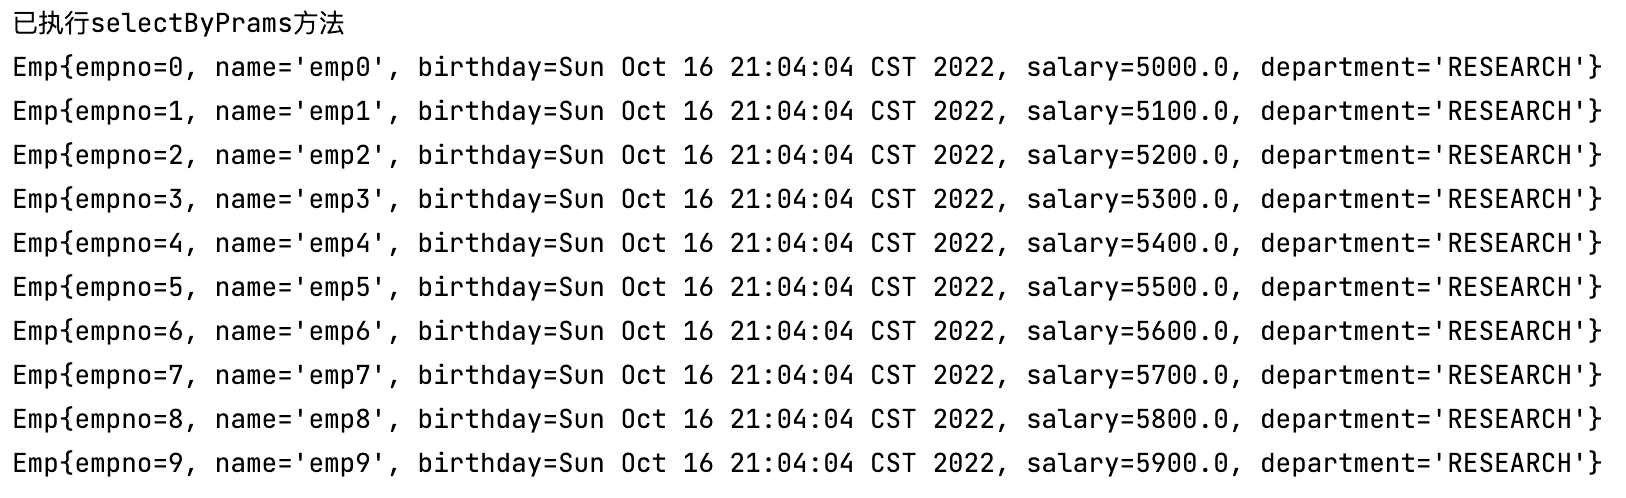
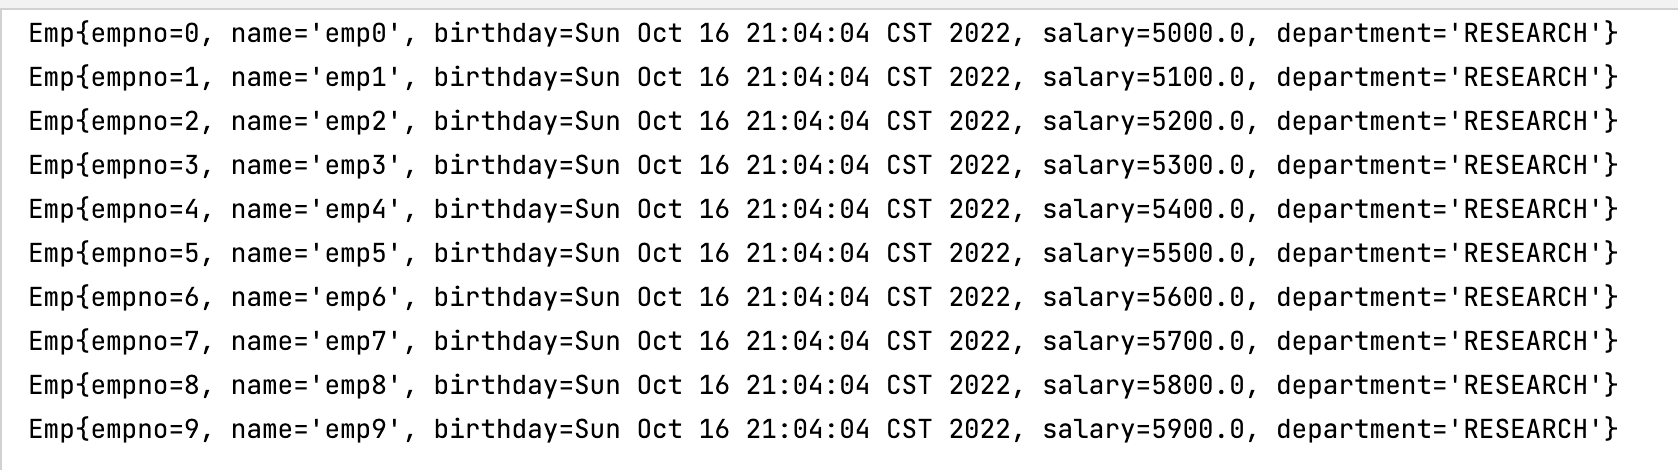
验证第一次执行testEmpRank测试方法,输出结果如下,说明执行了selectByPrams查询方法
验证第一次执行testFindById方法:可以看到就执行了一次findById方法,之后就一直从redis缓存中读取数据了,因为设置了缓存条件为只缓存EmpId是1000之外的数据,所以只要查询条件EmpId是1000就一直从数据库查询数据。

4.使用Spring Cache的问题
在刚才使用Spring Cache的时候有三个问题
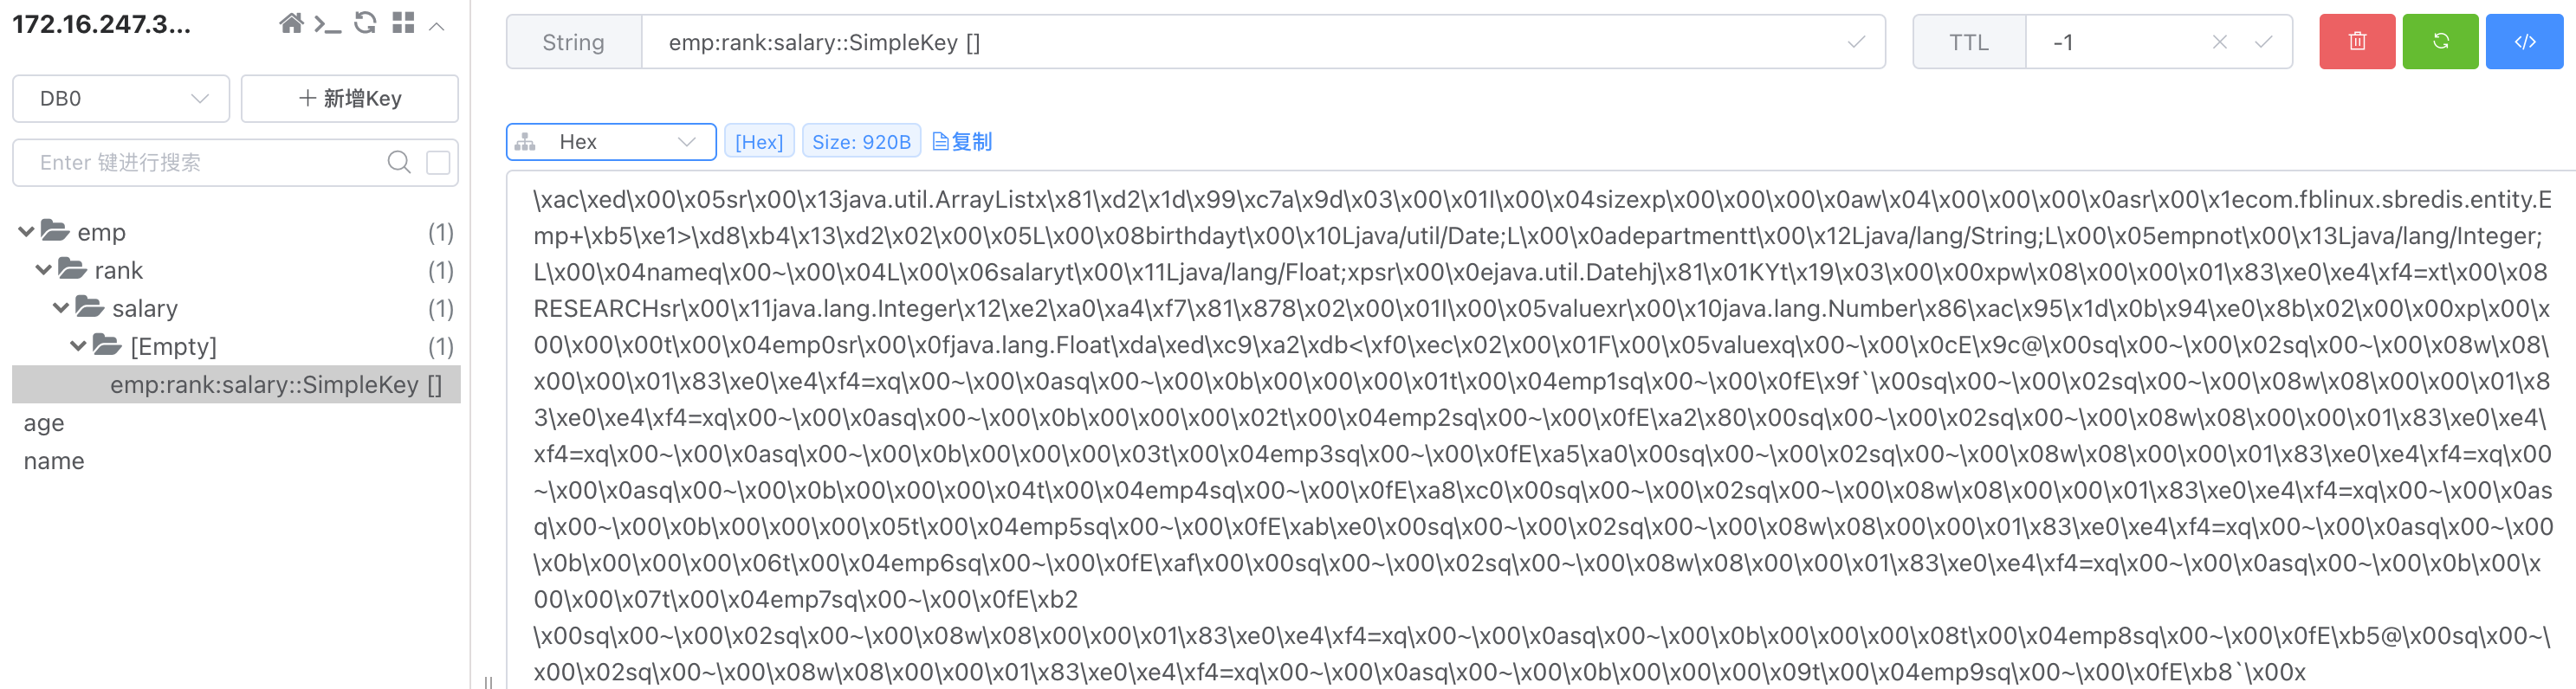
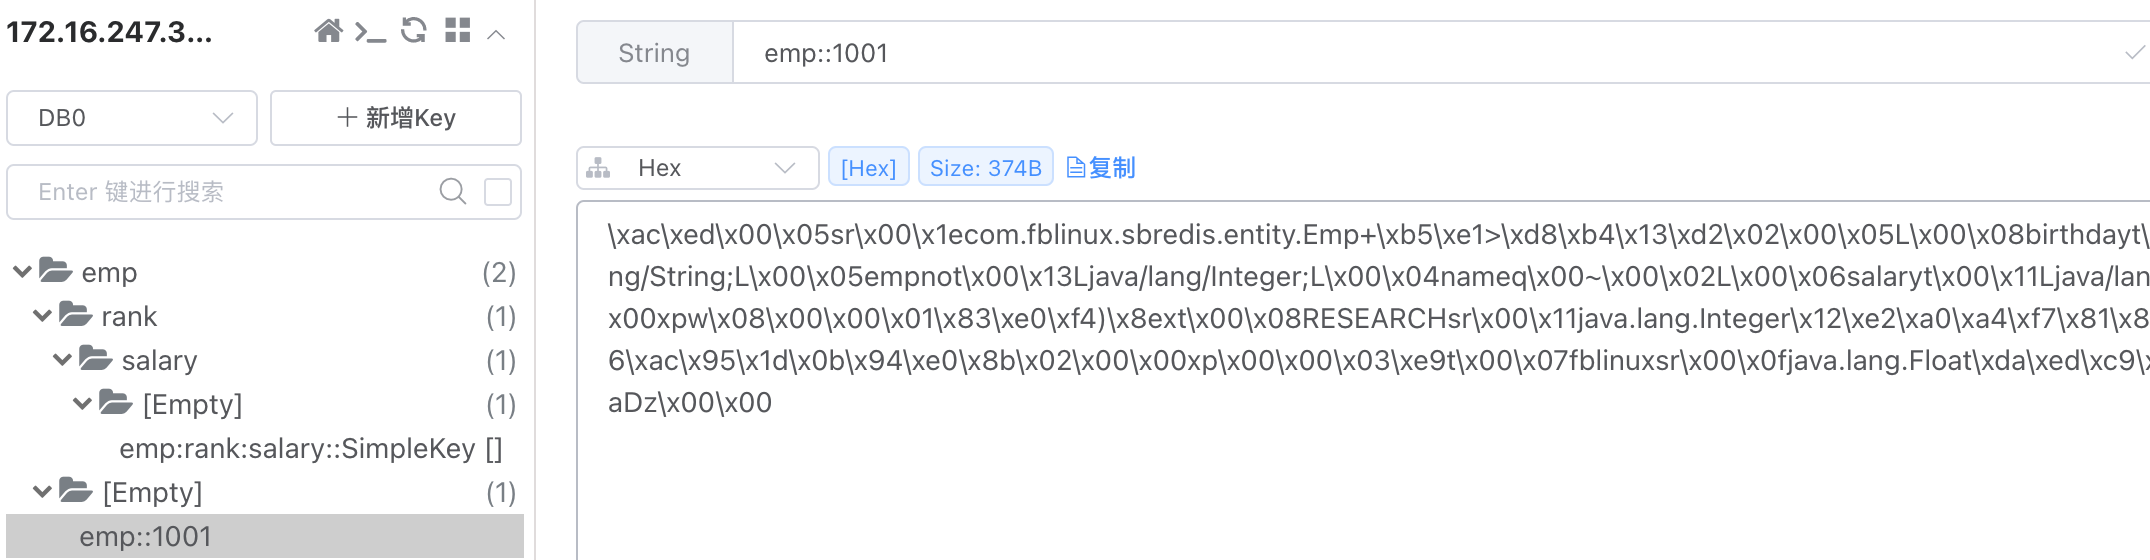
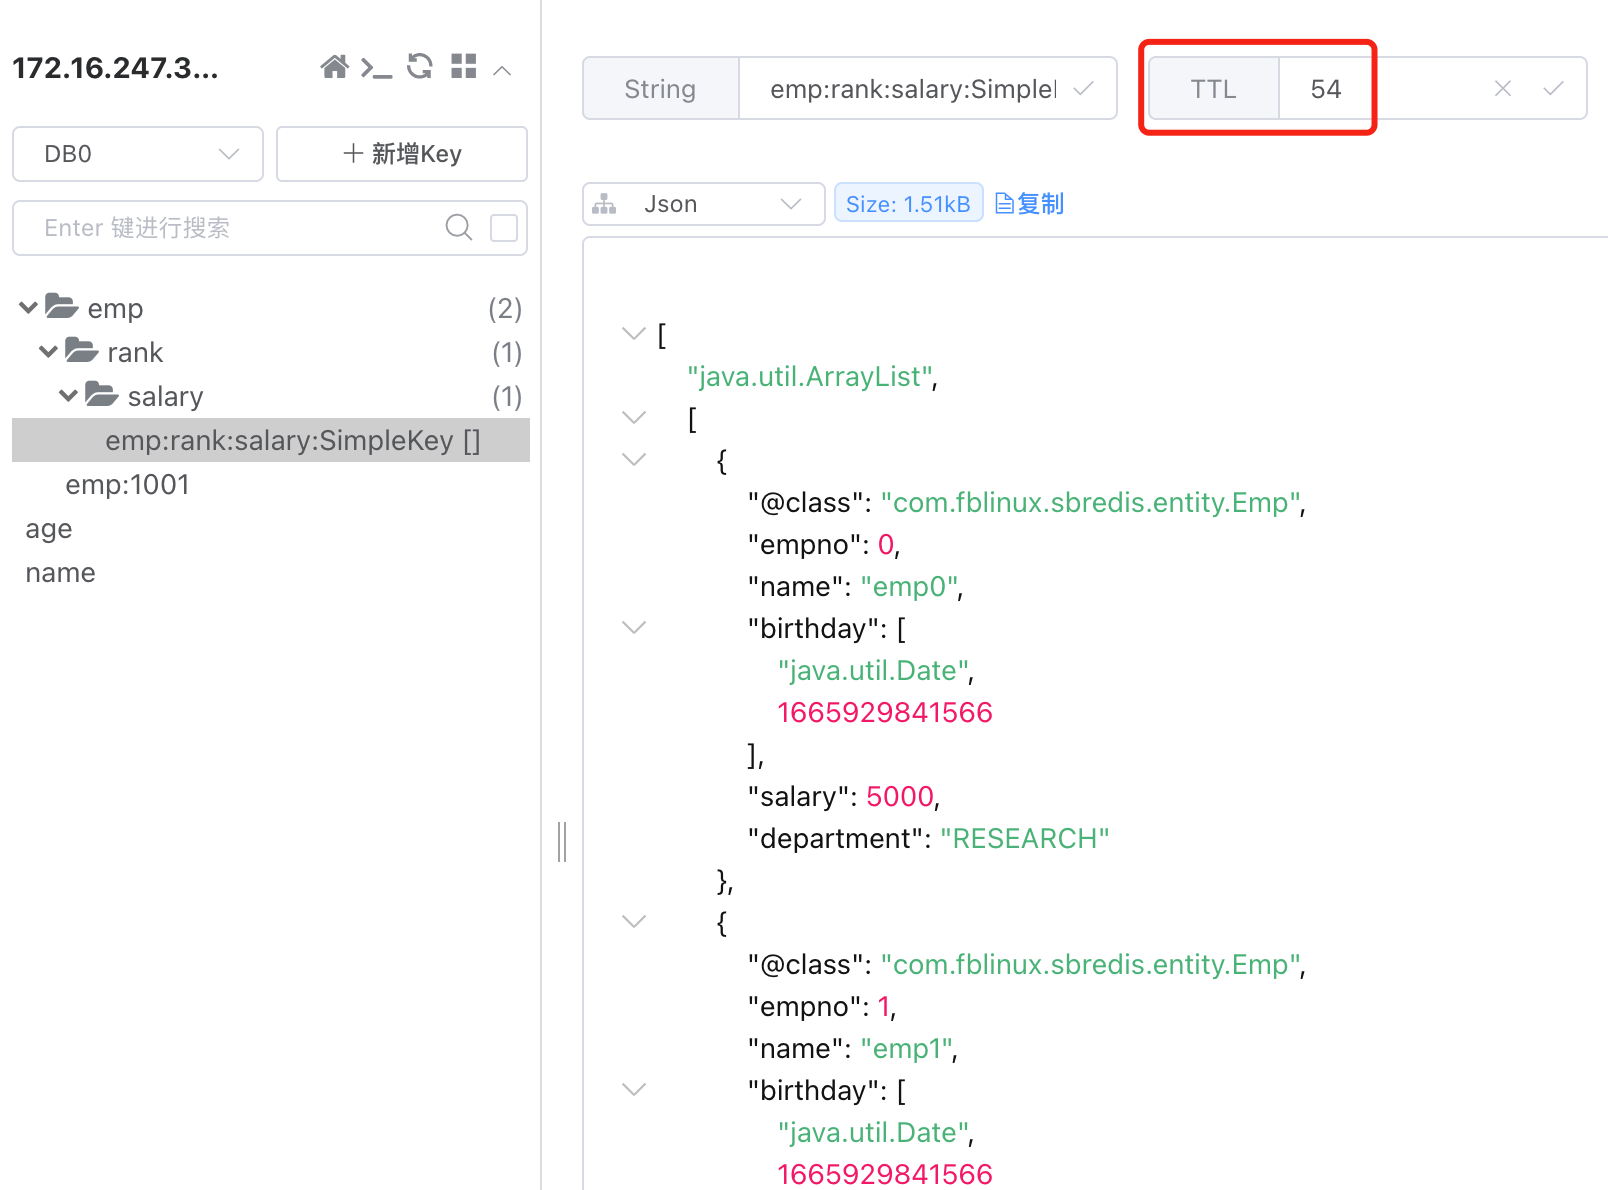
1、默认Spring Cache在redis存储数据时采用 :: 分割数据,并不是约定俗称的 冒号 分割
2、默认使用JDK序列化,正确姿势应该是应该为JSON序列化
3、默认Spring Cache注解是不支持Expire过期的,但这是日常开发中必然会用到的特性,
5.通过自定义CacheManager解决上述问题
创建应用配置类:
import org.springframework.cache.CacheManager;
import org.springframework.context.annotation.Bean;
import org.springframework.context.annotation.Configuration;
import org.springframework.context.annotation.Primary;
import org.springframework.data.redis.cache.RedisCacheConfiguration;
import org.springframework.data.redis.cache.RedisCacheManager;
import org.springframework.data.redis.connection.lettuce.LettuceConnectionFactory;
import org.springframework.data.redis.serializer.GenericJackson2JsonRedisSerializer;
import org.springframework.data.redis.serializer.RedisSerializationContext;
import org.springframework.data.redis.serializer.StringRedisSerializer;
import java.time.Duration;
@Configuration
public class SpringCacheConfgiration {
@Bean
@Primary //设置默认的CacheManager
public CacheManager cacheManager(LettuceConnectionFactory factory){
//加载默认Spring Cache配置信息
RedisCacheConfiguration config = RedisCacheConfiguration.defaultCacheConfig();
//设置有效期为1小时
config = config.entryTtl(Duration.ofHours(1));
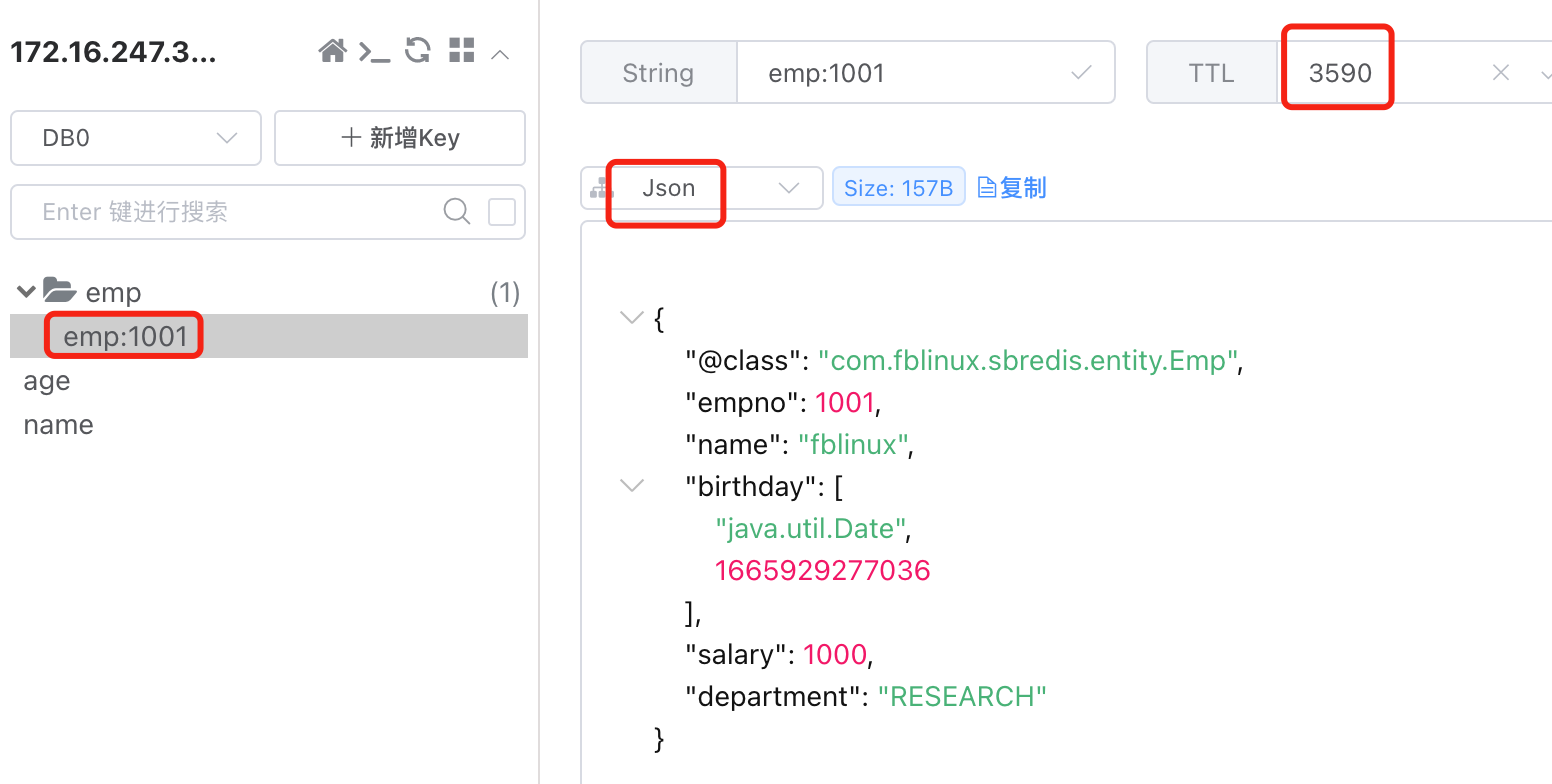
//说明缓存Key使用单冒号进行分割
config = config.computePrefixWith(cacheName -> cacheName + ":");
//Redis Key采用String直接存储
config = config.serializeKeysWith(RedisSerializationContext.SerializationPair.fromSerializer(new StringRedisSerializer()));
//Redis Value则将对象采用JSON形式存储
config = config.serializeValuesWith(RedisSerializationContext.SerializationPair.fromSerializer(new GenericJackson2JsonRedisSerializer()));
//不缓存Null值对象
config = config.disableCachingNullValues();
//实例化CacheManger缓存管理器
RedisCacheManager cacheManager = RedisCacheManager.RedisCacheManagerBuilder
//绑定REDIS连接工厂
.fromConnectionFactory(factory)
//绑定配置对象
.cacheDefaults(config)
//与声明式事务注解@Transactional进行兼容
.transactionAware()
//完成对象构建
.build();
return cacheManager;
}
// 上面key有效期配置的是一个小时,实际生产环境中不同的key需要设置不同的有效期,这里需要对这种情况单独创建一个cacheManager
@Bean
public CacheManager cacheManager1m(LettuceConnectionFactory factory){
//加载默认Spring Cache配置信息
RedisCacheConfiguration config = RedisCacheConfiguration.defaultCacheConfig();
//设置有效期为1小时
config = config.entryTtl(Duration.ofMinutes(1));
//说明缓存Key使用单冒号进行分割
config = config.computePrefixWith(cacheName -> cacheName + ":");
//Redis Key采用String直接存储
config = config.serializeKeysWith(RedisSerializationContext.SerializationPair.fromSerializer(new StringRedisSerializer()));
//Redis Value则将对象采用JSON形式存储
config = config.serializeValuesWith(RedisSerializationContext.SerializationPair.fromSerializer(new GenericJackson2JsonRedisSerializer()));
//不缓存Null值对象
config = config.disableCachingNullValues();
//实例化CacheManger缓存管理器
RedisCacheManager cacheManager = RedisCacheManager.RedisCacheManagerBuilder
//绑定REDIS连接工厂
.fromConnectionFactory(factory)
//绑定配置对象
.cacheDefaults(config)
//与声明式事务注解@Transactional进行兼容
.transactionAware()
//完成对象构建
.build();
return cacheManager;
}
}
针对个性化的场景设置单独的cacheManager来控制过期时间
@Cacheable(value = "emp:rank:salary" ,cacheManager = "cacheManager1m")
public List<Emp> getEmpRank() {
    return empDao.selectByParams();
}
转载请注明:西门飞冰的博客 » SpringCache声明式缓存